算力平台:
ControlNet
ControlNet 是一种通过使用额外的输入图像来控制图像扩散模型的模型。你可以使用多种类型的条件输入(如 Canny 边缘、用户草图、人体姿态、深度等)来控制扩散模型。这非常有用,因为它为你提供了更大的图像生成控制权,使你更容易生成特定的图像,而不必过多地尝试不同的文本提示或去噪值。
一个 ControlNet 模型有两组权重(或块),通过一个零卷积层连接:
- 锁定副本 保留了大型预训练扩散模型所学到的所有内容
- 可训练副本 在额外的条件输入上进行训练
由于锁定副本保留了预训练模型,因此在新的条件输入上训练和实现 ControlNet 的速度与微调任何其他模型一样快,因为你不需要从头开始训练模型。
本指南将向你展示如何使用 ControlNet 进行文本到图像、图像到图像、修复等操作!有许多类型的 ControlNet 条件输入可供选择,但在本指南中,我们只关注其中的几种。欢迎尝试其他条件输入!
在开始之前,请确保你已安装以下库:
py
# uncomment to install the necessary libraries in Colab
#!pip install -q diffusers transformers accelerate opencv-python
文本到图像
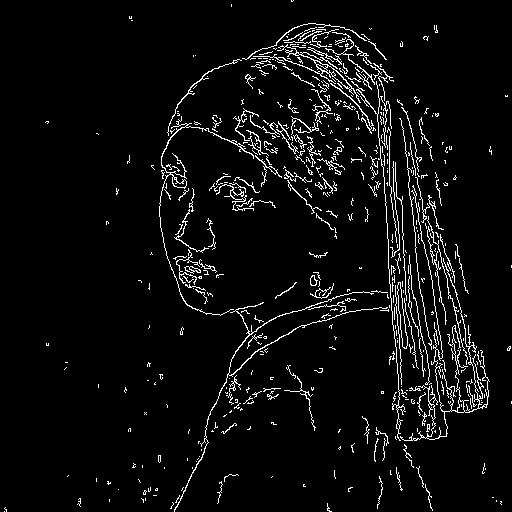
对于文本到图像的生成,你通常会向模型传递一个文本提示。但使用 ControlNet,你可以指定一个额外的条件输入。让我们用一个 canny 图像来条件化模型,这个图像是一个黑色背景上的白色轮廓。这样,ControlNet 可以使用 canny 图像作为控制,引导模型生成具有相同轮廓的图像。
加载一张图像,并使用 opencv-python 库提取 canny 图像:
py
from diffusers.utils import load_image, make_image_grid
from PIL import Image
import cv2
import numpy as np

original_image = load_image(
    "https://hf.co/datasets/huggingface/documentation-images/resolve/main/diffusers/input_image_vermeer.png"
)

image = np.array(original_image)

low_threshold = 100
high_threshold = 200

image = cv2.Canny(image, low_threshold, high_threshold)
image = image[:, :, None]
image = np.concatenate([image, image, image], axis=2)
canny_image = Image.fromarray(image)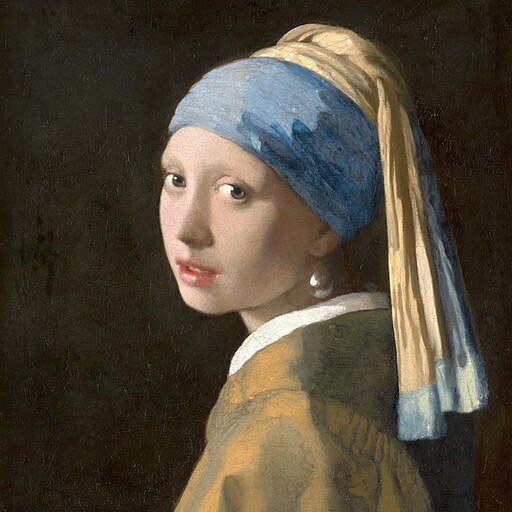
接下来,加载一个基于 canny 边缘检测条件化的 ControlNet 模型,并将其传递给 [StableDiffusionControlNetPipeline]。使用更快的 [UniPCMultistepScheduler] 并启用模型卸载以加快推理速度并减少内存使用。
py
from diffusers import StableDiffusionControlNetPipeline, ControlNetModel, UniPCMultistepScheduler
import torch

controlnet = ControlNetModel.from_pretrained("lllyasviel/sd-controlnet-canny", torch_dtype=torch.float16, use_safetensors=True)
pipe = StableDiffusionControlNetPipeline.from_pretrained(
    "stable-diffusion-v1-5/stable-diffusion-v1-5", controlnet=controlnet, torch_dtype=torch.float16, use_safetensors=True
)

pipe.scheduler = UniPCMultistepScheduler.from_config(pipe.scheduler.config)
pipe.enable_model_cpu_offload()
现在将你的提示和 canny 图像传递给管道:
py
output = pipe(
    "the mona lisa", image=canny_image
).images[0]
make_image_grid([original_image, canny_image, output], rows=1, cols=3)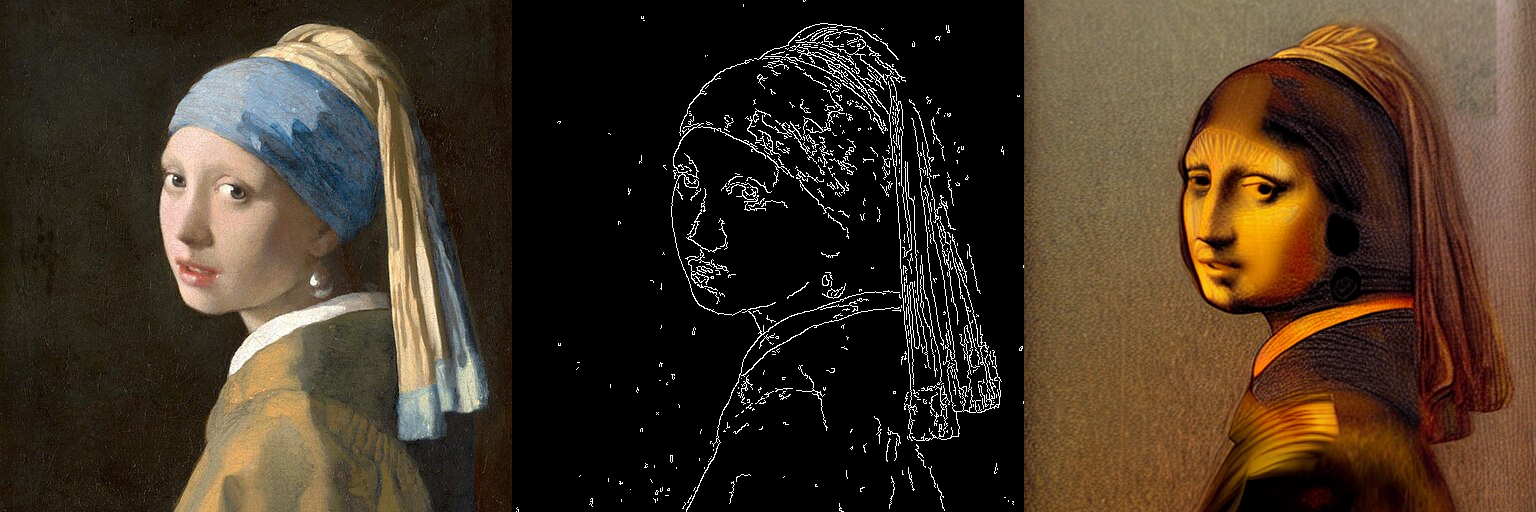
图像到图像
对于图像到图像的任务,你通常会传递一个初始图像和一个提示给管道,以生成一张新图像。使用 ControlNet,你可以传递一个额外的条件输入来指导模型。让我们用深度图来条件化模型,深度图是一种包含空间信息的图像。这样,ControlNet 可以使用深度图作为控制,指导模型生成一张保留空间信息的图像。
你将使用 [StableDiffusionControlNetImg2ImgPipeline] 来完成这个任务,它与 [StableDiffusionControlNetPipeline] 不同,因为它允许你传递一个初始图像作为图像生成过程的起点。
加载一张图像,并使用 🤗 Transformers 中的 depth-estimation [~transformers.Pipeline] 来提取图像的深度图:
py
import torch
import numpy as np

from transformers import pipeline
from diffusers.utils import load_image, make_image_grid

image = load_image(
    "https://huggingface.co/datasets/huggingface/documentation-images/resolve/main/diffusers/controlnet-img2img.jpg"
)

def get_depth_map(image, depth_estimator):
    image = depth_estimator(image)["depth"]
    image = np.array(image)
    image = image[:, :, None]
    image = np.concatenate([image, image, image], axis=2)
    detected_map = torch.from_numpy(image).float() / 255.0
    depth_map = detected_map.permute(2, 0, 1)
    return depth_map

depth_estimator = pipeline("depth-estimation")
depth_map = get_depth_map(image, depth_estimator).unsqueeze(0).half().to("cuda")
接下来,加载一个基于深度图条件的 ControlNet 模型,并将其传递给 [StableDiffusionControlNetImg2ImgPipeline]。使用更快的 [UniPCMultistepScheduler] 并启用模型卸载以加快推理速度并减少内存使用。
py
from diffusers import StableDiffusionControlNetImg2ImgPipeline, ControlNetModel, UniPCMultistepScheduler
import torch
controlnet = ControlNetModel.from_pretrained("lllyasviel/control_v11f1p_sd15_depth", torch_dtype=torch.float16, use_safetensors=True)
pipe = StableDiffusionControlNetImg2ImgPipeline.from_pretrained(
"stable-diffusion-v1-5/stable-diffusion-v1-5", controlnet=controlnet, torch_dtype=torch.float16, use_safetensors=True
)
pipe.scheduler = UniPCMultistepScheduler.from_config(pipe.scheduler.config)
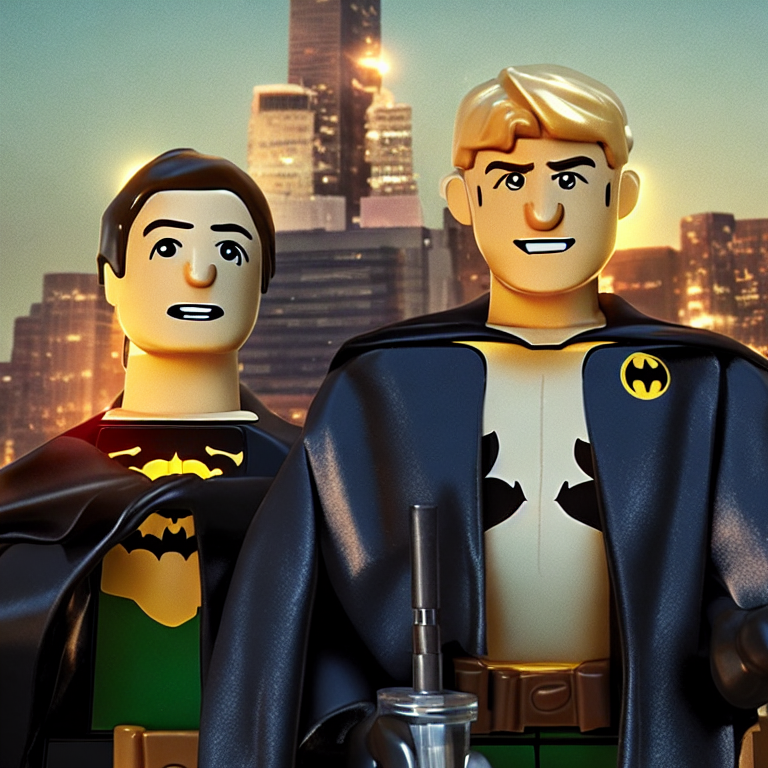
pipe.enable_model_cpu_offload()现在将你的提示、初始图像和深度图传递给管道:
py
output = pipe(
    "lego batman and robin", image=image, control_image=depth_map,
).images[0]
make_image_grid([image, output], rows=1, cols=2)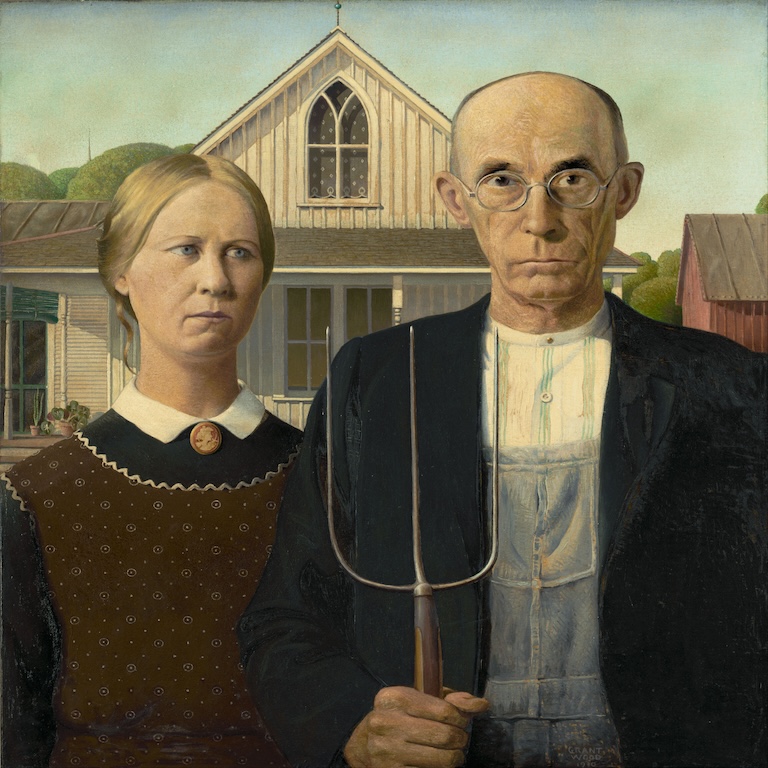
修复
对于修复,你需要一个初始图像、一个掩码图像和一个描述要替换掩码内容的提示。ControlNet 模型允许你添加另一个控制图像来条件化模型。让我们用修复掩码来条件化模型。这样,ControlNet 可以使用修复掩码作为控制来指导模型在掩码区域内生成图像。
加载一个初始图像和一个掩码图像:
py
from diffusers.utils import load_image, make_image_grid

init_image = load_image(
    "https://huggingface.co/datasets/huggingface/documentation-images/resolve/main/diffusers/controlnet-inpaint.jpg"
)
init_image = init_image.resize((512, 512))

mask_image = load_image(
    "https://huggingface.co/datasets/huggingface/documentation-images/resolve/main/diffusers/controlnet-inpaint-mask.jpg"
)
mask_image = mask_image.resize((512, 512))
make_image_grid([init_image, mask_image], rows=1, cols=2)
创建一个函数,从初始图像和掩码图像中准备控制图像。这将创建一个张量,用于标记 init_image 中的像素,如果 mask_image 中相应像素超过某个阈值,则将其标记为掩码。
py
import numpy as np
import torch

def make_inpaint_condition(image, image_mask):
    image = np.array(image.convert("RGB")).astype(np.float32) / 255.0
    image_mask = np.array(image_mask.convert("L")).astype(np.float32) / 255.0

    assert image.shape[0:1] == image_mask.shape[0:1]
    image[image_mask > 0.5] = -1.0  # set as masked pixel
    image = np.expand_dims(image, 0).transpose(0, 3, 1, 2)
    image = torch.from_numpy(image)
    return image

control_image = make_inpaint_condition(init_image, mask_image)

加载一个基于修复的 ControlNet 模型,并将其传递给 [StableDiffusionControlNetInpaintPipeline]。使用更快的 [UniPCMultistepScheduler],并启用模型卸载以加快推理速度并减少内存使用。
py
from diffusers import StableDiffusionControlNetInpaintPipeline, ControlNetModel, UniPCMultistepScheduler

controlnet = ControlNetModel.from_pretrained("lllyasviel/control_v11p_sd15_inpaint", torch_dtype=torch.float16, use_safetensors=True)
pipe = StableDiffusionControlNetInpaintPipeline.from_pretrained(
    "stable-diffusion-v1-5/stable-diffusion-v1-5", controlnet=controlnet, torch_dtype=torch.float16, use_safetensors=True
)

pipe.scheduler = UniPCMultistepScheduler.from_config(pipe.scheduler.config)
pipe.enable_model_cpu_offload()
现在将你的提示、初始图像、掩码图像和控制图像传递给管道:
py
output = pipe(
    "corgi face with large ears, detailed, pixar, animated, disney",
    num_inference_steps=20,
    eta=1.0,
    image=init_image,
    mask_image=mask_image,
    control_image=control_image,
).images[0]
make_image_grid([init_image, mask_image, output], rows=1, cols=3)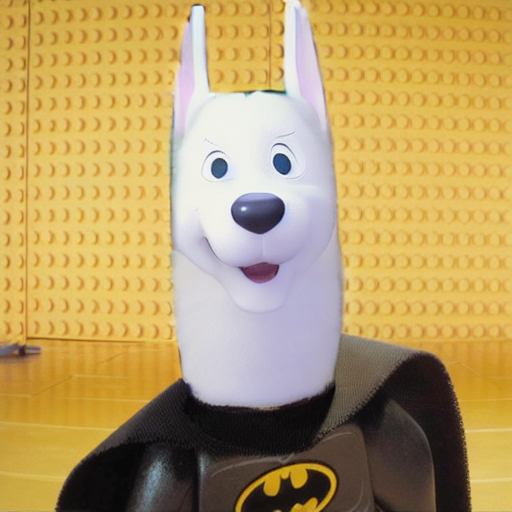
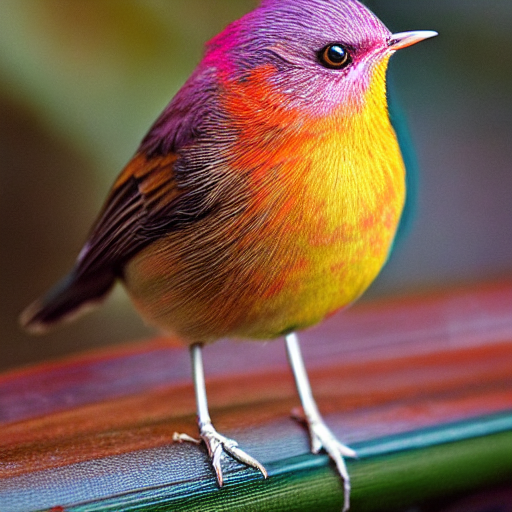
猜测模式
猜测模式 完全不需要向 ControlNet 提供提示!这迫使 ControlNet 编码器尽其所能地“猜测”输入控制图(深度图、姿态估计、Canny 边缘等)的内容。
猜测模式根据块深度以固定比例调整 ControlNet 输出残差的尺度。最浅的 DownBlock 对应于 0.1,随着块的加深,尺度呈指数增长,使得 MidBlock 输出的尺度变为 1.0。
在管道中设置 guess_mode=True,并且建议将 guidance_scale 值设置在 3.0 到 5.0 之间。
py
from diffusers import StableDiffusionControlNetPipeline, ControlNetModel
from diffusers.utils import load_image, make_image_grid
import numpy as np
import torch
from PIL import Image
import cv2

controlnet = ControlNetModel.from_pretrained("lllyasviel/sd-controlnet-canny", use_safetensors=True)
pipe = StableDiffusionControlNetPipeline.from_pretrained("stable-diffusion-v1-5/stable-diffusion-v1-5", controlnet=controlnet, use_safetensors=True).to("cuda")

original_image = load_image("https://huggingface.co/takuma104/controlnet_dev/resolve/main/bird_512x512.png")

image = np.array(original_image)

low_threshold = 100
high_threshold = 200

image = cv2.Canny(image, low_threshold, high_threshold)
image = image[:, :, None]
image = np.concatenate([image, image, image], axis=2)
canny_image = Image.fromarray(image)

image = pipe("", image=canny_image, guess_mode=True, guidance_scale=3.0).images[0]
make_image_grid([original_image, canny_image, image], rows=1, cols=3)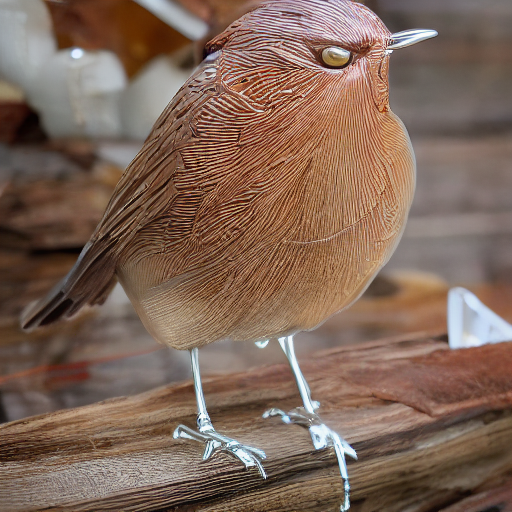
使用Stable Diffusion XL的ControlNet
目前与Stable Diffusion XL(SDXL)兼容的ControlNet模型并不多,但我们已经为SDXL训练了两个全尺寸的ControlNet模型,分别基于Canny边缘检测和深度图。我们还在尝试创建这些SDXL兼容的ControlNet模型的小型版本,以便更容易在资源受限的硬件上运行。你可以在🤗 Diffusers Hub组织找到这些检查点!
让我们使用一个基于Canny图像的SDXL ControlNet来生成图像。首先加载一张图像并准备Canny图像:
py
from diffusers import StableDiffusionXLControlNetPipeline, ControlNetModel, AutoencoderKL
from diffusers.utils import load_image, make_image_grid
from PIL import Image
import cv2
import numpy as np
import torch

original_image = load_image(
    "https://huggingface.co/datasets/hf-internal-testing/diffusers-images/resolve/main/sd_controlnet/hf-logo.png"
)

image = np.array(original_image)

low_threshold = 100
high_threshold = 200

image = cv2.Canny(image, low_threshold, high_threshold)
image = image[:, :, None]
image = np.concatenate([image, image, image], axis=2)
canny_image = Image.fromarray(image)
make_image_grid([original_image, canny_image], rows=1, cols=2)加载一个基于Canny边缘检测的SDXL ControlNet模型,并将其传递给[StableDiffusionXLControlNetPipeline]。你还可以启用模型卸载以减少内存使用。
py
controlnet = ControlNetModel.from_pretrained(
    "diffusers/controlnet-canny-sdxl-1.0",
    torch_dtype=torch.float16,
    use_safetensors=True
)
vae = AutoencoderKL.from_pretrained("madebyollin/sdxl-vae-fp16-fix", torch_dtype=torch.float16, use_safetensors=True)
pipe = StableDiffusionXLControlNetPipeline.from_pretrained(
    "stabilityai/stable-diffusion-xl-base-1.0",
    controlnet=controlnet,
    vae=vae,
    torch_dtype=torch.float16,
    use_safetensors=True
)
pipe.enable_model_cpu_offload()
现在将你的提示(以及可选的负面提示,如果你在使用的话)和canny图像传递给管道:
py
prompt = "aerial view, a futuristic research complex in a bright foggy jungle, hard lighting"
negative_prompt = 'low quality, bad quality, sketches'

image = pipe(
    prompt,
    negative_prompt=negative_prompt,
    image=canny_image,
    controlnet_conditioning_scale=0.5,
).images[0]
make_image_grid([original_image, canny_image, image], rows=1, cols=3)
你也可以通过将参数设置为True,在猜测模式下使用[StableDiffusionXLControlNetPipeline]:
py
from diffusers import StableDiffusionXLControlNetPipeline, ControlNetModel, AutoencoderKL
from diffusers.utils import load_image, make_image_grid
import numpy as np
import torch
import cv2
from PIL import Image

prompt = "aerial view, a futuristic research complex in a bright foggy jungle, hard lighting"
negative_prompt = "low quality, bad quality, sketches"

original_image = load_image(
    "https://hf.co/datasets/hf-internal-testing/diffusers-images/resolve/main/sd_controlnet/hf-logo.png"
)

controlnet = ControlNetModel.from_pretrained(
    "diffusers/controlnet-canny-sdxl-1.0", torch_dtype=torch.float16, use_safetensors=True
)
vae = AutoencoderKL.from_pretrained("madebyollin/sdxl-vae-fp16-fix", torch_dtype=torch.float16, use_safetensors=True)
pipe = StableDiffusionXLControlNetPipeline.from_pretrained(
    "stabilityai/stable-diffusion-xl-base-1.0", controlnet=controlnet, vae=vae, torch_dtype=torch.float16, use_safetensors=True
)
pipe.enable_model_cpu_offload()

image = np.array(original_image)
image = cv2.Canny(image, 100, 200)
image = image[:, :, None]
image = np.concatenate([image, image, image], axis=2)
canny_image = Image.fromarray(image)

image = pipe(
    prompt, negative_prompt=negative_prompt, controlnet_conditioning_scale=0.5, image=canny_image, guess_mode=True,
).images[0]
make_image_grid([original_image, canny_image, image], rows=1, cols=3)
py
base = StableDiffusionXLControlNetPipeline(...)
image = base(
    prompt=prompt,
    controlnet_conditioning_scale=0.5,
    image=canny_image,
    num_inference_steps=40,
    denoising_end=0.8,
    output_type="latent",
).images
# rest exactly as with StableDiffusionXLPipeline
MultiControlNet
你可以将来自不同图像输入的多个ControlNet条件组合起来,创建一个MultiControlNet。为了获得更好的结果,通常有助于:
- 对条件进行掩码处理,使其不重叠(例如,掩码canny图像中姿势条件所在区域的区域)
- 尝试使用
controlnet_conditioning_scale参数来确定每个条件输入的权重
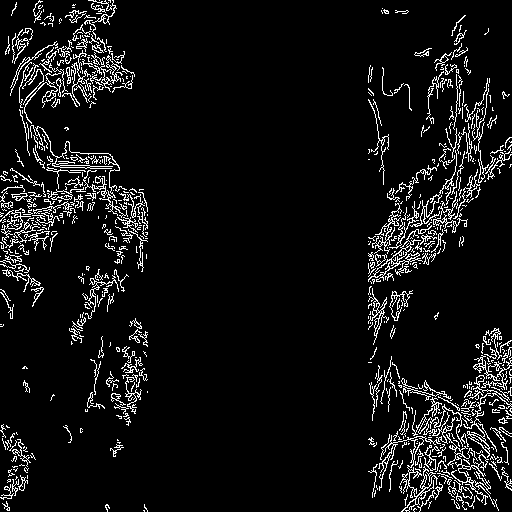
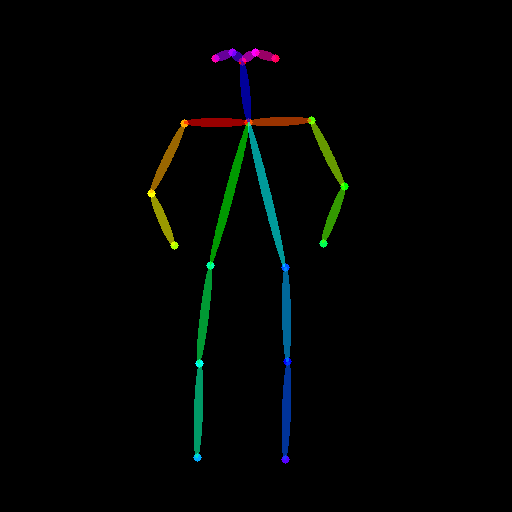
在这个示例中,你将结合canny图像和人体姿态估计图像来生成一张新图像。
准备canny图像条件:
py
from diffusers.utils import load_image, make_image_grid
from PIL import Image
import numpy as np
import cv2

original_image = load_image(
    "https://huggingface.co/datasets/huggingface/documentation-images/resolve/main/diffusers/landscape.png"
)
image = np.array(original_image)

low_threshold = 100
high_threshold = 200

image = cv2.Canny(image, low_threshold, high_threshold)

# zero out middle columns of image where pose will be overlaid
zero_start = image.shape[1] // 4
zero_end = zero_start + image.shape[1] // 2
image[:, zero_start:zero_end] = 0

image = image[:, :, None]
image = np.concatenate([image, image, image], axis=2)
canny_image = Image.fromarray(image)
make_image_grid([original_image, canny_image], rows=1, cols=2)
对于人体姿态估计,请安装 controlnet_aux:
py
# uncomment to install the necessary library in Colab
#!pip install -q controlnet-aux
准备人体姿态估计的条件:
py
from controlnet_aux import OpenposeDetector

openpose = OpenposeDetector.from_pretrained("lllyasviel/ControlNet")
original_image = load_image(
    "https://huggingface.co/datasets/huggingface/documentation-images/resolve/main/diffusers/person.png"
)
openpose_image = openpose(original_image)
make_image_grid([original_image, openpose_image], rows=1, cols=2)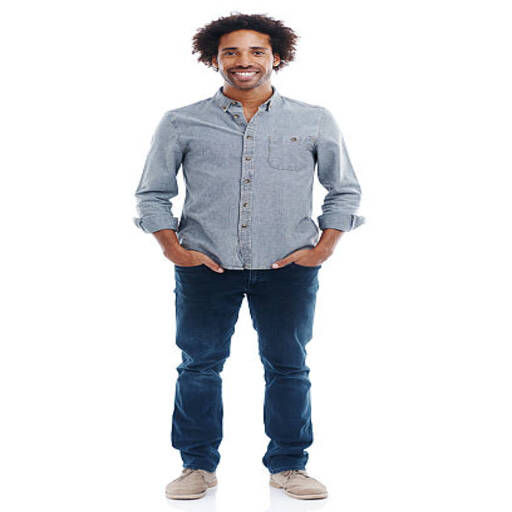
加载与每个条件对应的 ControlNet 模型列表,并将它们传递给 [StableDiffusionXLControlNetPipeline]。使用更快的 [UniPCMultistepScheduler] 并启用模型卸载以减少内存使用。
py
from diffusers import StableDiffusionXLControlNetPipeline, ControlNetModel, AutoencoderKL, UniPCMultistepScheduler
import torch

controlnets = [
    ControlNetModel.from_pretrained(
        "thibaud/controlnet-openpose-sdxl-1.0", torch_dtype=torch.float16
    ),
    ControlNetModel.from_pretrained(
        "diffusers/controlnet-canny-sdxl-1.0", torch_dtype=torch.float16, use_safetensors=True
    ),
]

vae = AutoencoderKL.from_pretrained("madebyollin/sdxl-vae-fp16-fix", torch_dtype=torch.float16, use_safetensors=True)
pipe = StableDiffusionXLControlNetPipeline.from_pretrained(
    "stabilityai/stable-diffusion-xl-base-1.0", controlnet=controlnets, vae=vae, torch_dtype=torch.float16, use_safetensors=True
)
pipe.scheduler = UniPCMultistepScheduler.from_config(pipe.scheduler.config)
pipe.enable_model_cpu_offload()
现在你可以将你的提示(如果你使用的话,还可以包括一个可选的负面提示)、canny 图像和姿态图像传递给管道:
py
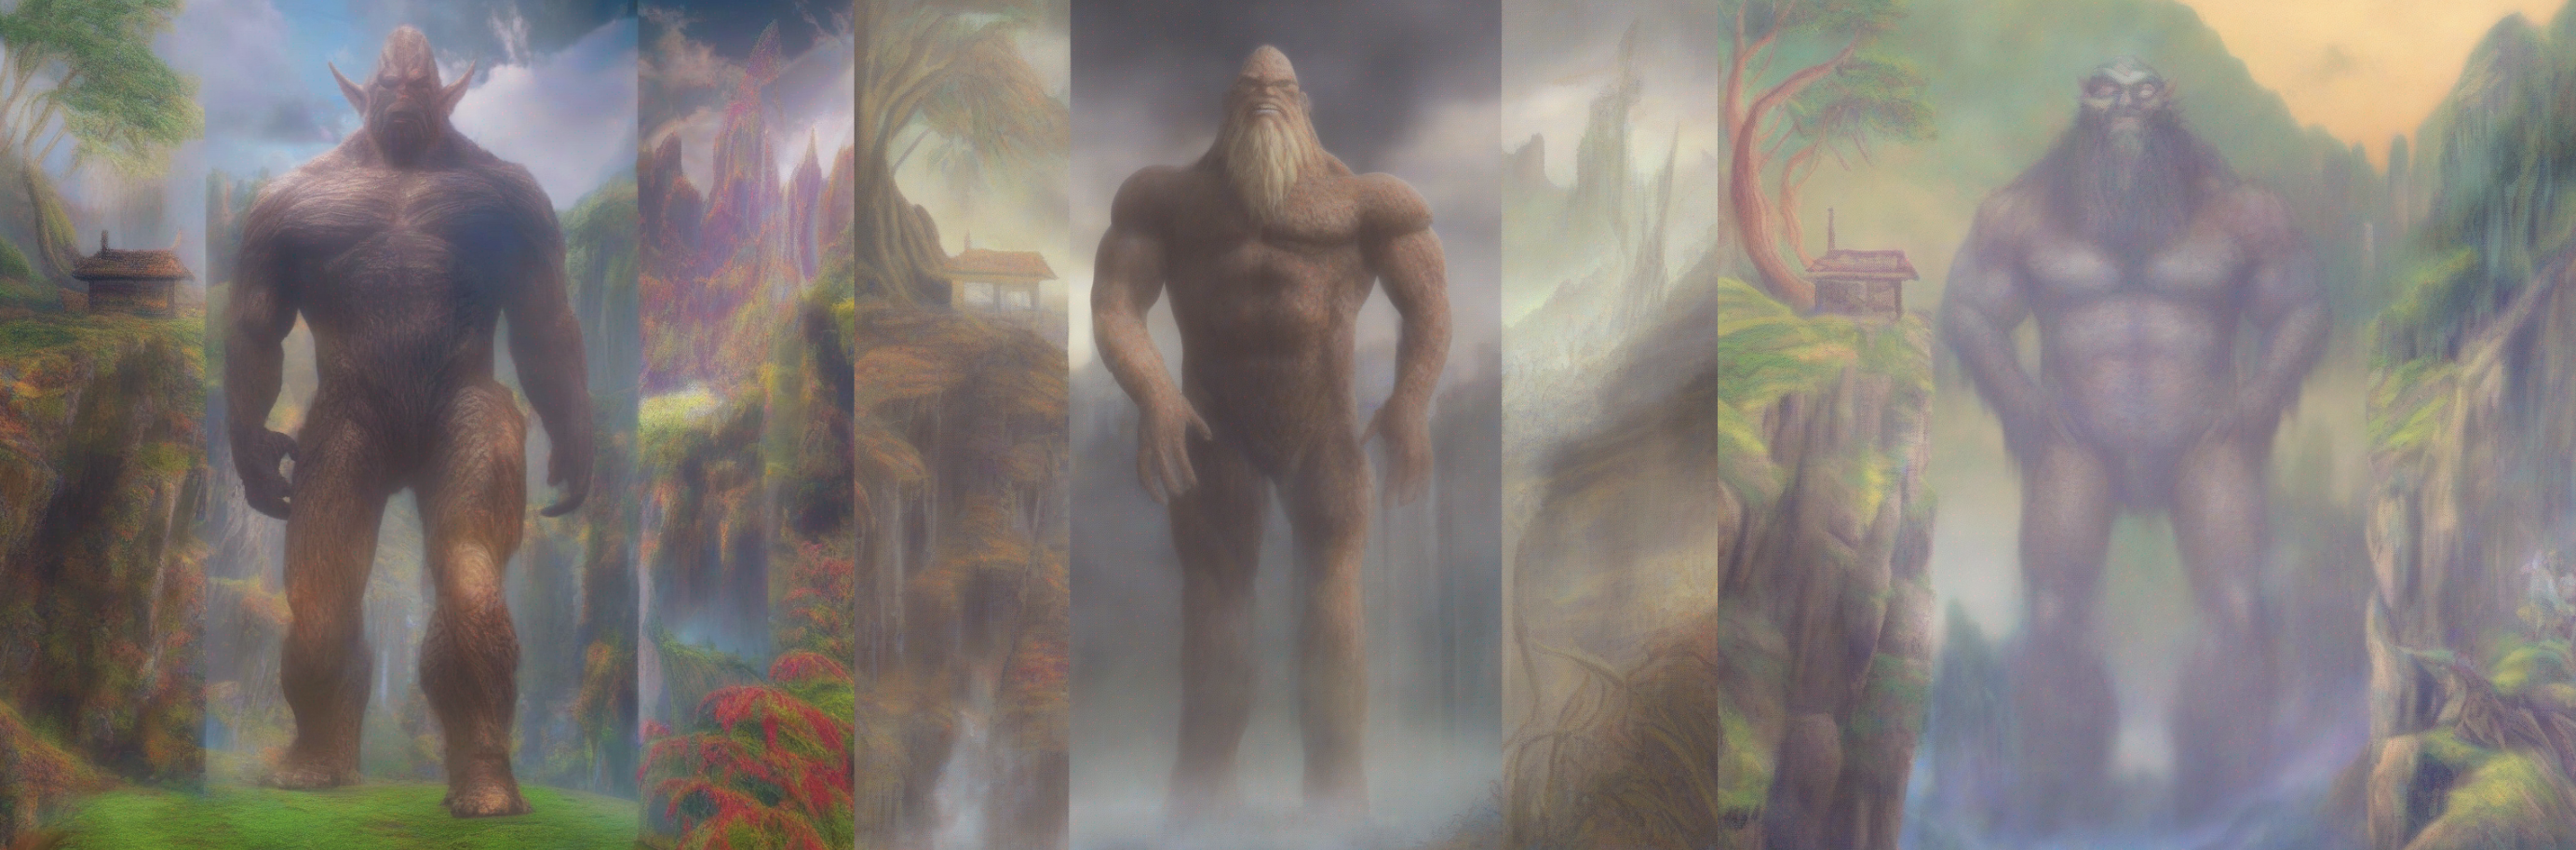
prompt = "a giant standing in a fantasy landscape, best quality"
negative_prompt = "monochrome, lowres, bad anatomy, worst quality, low quality"

generator = torch.manual_seed(1)

images = [openpose_image.resize((1024, 1024)), canny_image.resize((1024, 1024))]

images = pipe(
    prompt,
    image=images,
    num_inference_steps=25,
    generator=generator,
    negative_prompt=negative_prompt,
    num_images_per_prompt=3,
    controlnet_conditioning_scale=[1.0, 0.8],
).images
make_image_grid([original_image, canny_image, openpose_image,
                images[0].resize((512, 512)), images[1].resize((512, 512)), images[2].resize((512, 512))], rows=2, cols=3)