算力平台:
提示技巧
[[open-in-colab]]
提示非常重要,因为它们描述了你希望扩散模型生成什么内容。最好的提示是详细、具体且结构良好的,以帮助模型实现你的愿景。但制作一个出色的提示需要时间和精力,有时仅靠语言和词汇可能不够精确。这就是你需要通过其他技巧(如提示增强和提示加权)来提升提示效果,以获得你想要的结果。
本指南将向你展示如何使用这些提示技巧,以较低的努力生成高质量的图像,并调整提示中某些关键词的权重。
提示工程
TIP
这不是一个详尽的提示工程指南,但它将帮助你理解一个好的提示所需的必要部分。我们鼓励你继续尝试不同的提示,并以新的方式组合它们,看看哪种效果最好。随着你编写更多提示,你将培养出对什么有效、什么无效的直觉!
新的扩散模型在从基本提示生成高质量图像方面做得相当不错,但仍然重要的是要创建一个写得好的提示,以获得最佳结果。以下是编写好提示的一些技巧:
- 图像的媒介是什么?是照片、绘画、3D插图还是其他什么?
- 图像的主题是什么?是人、动物、物体还是场景?
- 你希望在图像中看到哪些细节?这是你可以真正发挥创意并尝试不同词汇来赋予图像生命的地方。例如,光线如何?氛围和美学是什么?你想要什么样的艺术或插图风格?你使用的词汇越具体和精确,模型就越能理解你想要生成什么。

使用GPT2进行提示词增强
提示词增强是一种快速提升提示词质量的技术,无需花费过多精力构建提示词。它利用像GPT2这样的模型,该模型在Stable Diffusion文本提示上进行了预训练,能够自动为提示词添加额外的关键字,以生成高质量的图像。
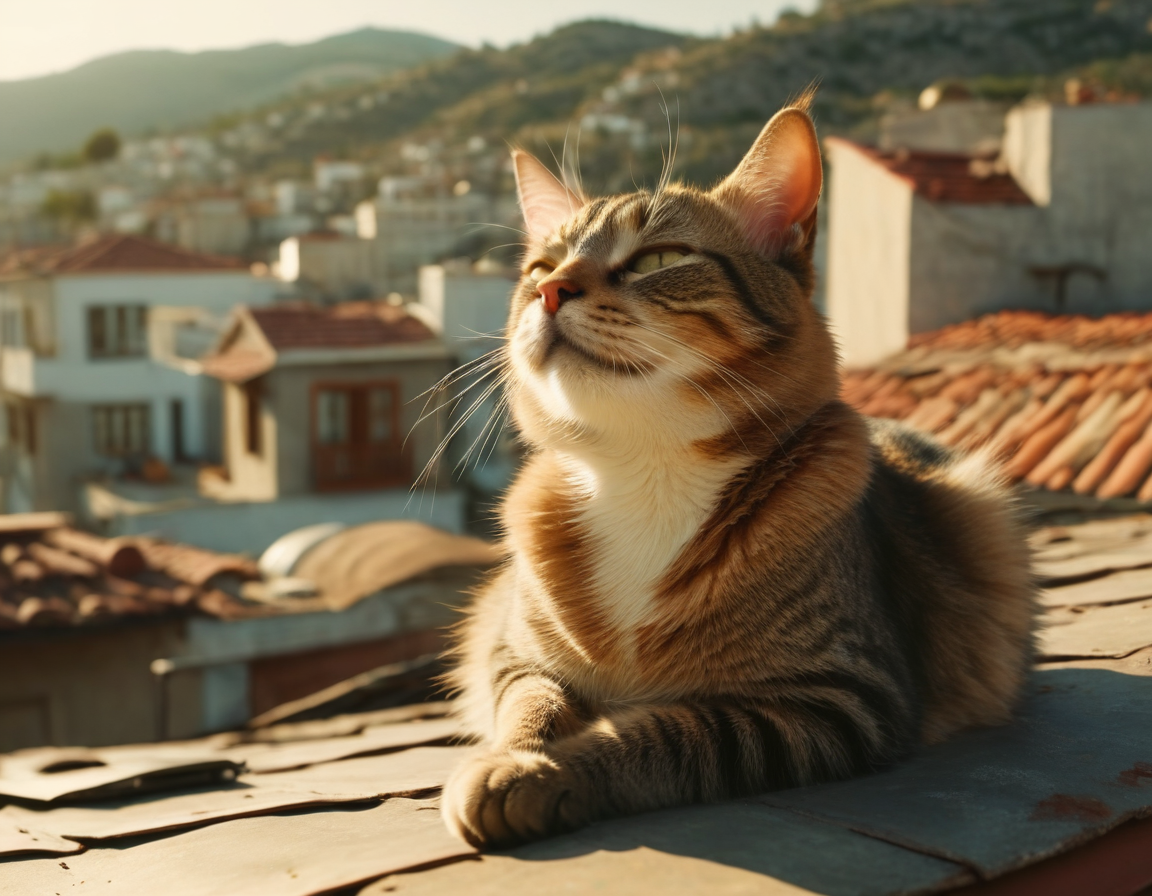
该技术通过精心挑选一组特定关键词,并强制模型生成这些词来增强原始提示词。这样,你的提示词可以是"一只猫",而GPT2可以将其增强为"土耳其屋顶上晒太阳的猫的电影剧照,高度详细,高预算好莱坞电影,宽银幕,情绪化,史诗般,华丽,胶片颗粒质量,锐利焦点,美丽细节,精致,令人惊叹,史诗般"。
TIP
你还应该使用一个偏移噪声 LoRA来提高明亮和暗淡图像的对比度,并整体创造更好的光线效果。这个LoRA可以从stabilityai/stable-diffusion-xl-base-1.0获取。
首先,定义某些风格和词汇列表(你可以查看Fooocus使用的更全面的词汇和风格列表)来增强提示词。
py
import torch
from transformers import GenerationConfig, GPT2LMHeadModel, GPT2Tokenizer, LogitsProcessor, LogitsProcessorList
from diffusers import StableDiffusionXLPipeline

styles = {
    "cinematic": "cinematic film still of {prompt}, highly detailed, high budget hollywood movie, cinemascope, moody, epic, gorgeous, film grain",
    "anime": "anime artwork of {prompt}, anime style, key visual, vibrant, studio anime, highly detailed",
    "photographic": "cinematic photo of {prompt}, 35mm photograph, film, professional, 4k, highly detailed",
    "comic": "comic of {prompt}, graphic illustration, comic art, graphic novel art, vibrant, highly detailed",
    "lineart": "line art drawing {prompt}, professional, sleek, modern, minimalist, graphic, line art, vector graphics",
    "pixelart": " pixel-art {prompt}, low-res, blocky, pixel art style, 8-bit graphics",
}

words = [
    "aesthetic", "astonishing", "beautiful", "breathtaking", "composition", "contrasted", "epic", "moody", "enhanced",
    "exceptional", "fascinating", "flawless", "glamorous", "glorious", "illumination", "impressive", "improved",
    "inspirational", "magnificent", "majestic", "hyperrealistic", "smooth", "sharp", "focus", "stunning", "detailed",
    "intricate", "dramatic", "high", "quality", "perfect", "light", "ultra", "highly", "radiant", "satisfying",
    "soothing", "sophisticated", "stylish", "sublime", "terrific", "touching", "timeless", "wonderful", "unbelievable",
    "elegant", "awesome", "amazing", "dynamic", "trendy",
]
你可能已经注意到,在 words 列表中,有些单词可以配对在一起,形成更有意义的组合。例如,单词 "high" 和 "quality" 可以组合成 "high quality"。让我们把这些单词配对在一起,并移除那些无法配对的单词。
py
word_pairs = ["highly detailed", "high quality", "enhanced quality", "perfect composition", "dynamic light"]

def find_and_order_pairs(s, pairs):
    words = s.split()
    found_pairs = []
    for pair in pairs:
        pair_words = pair.split()
        if pair_words[0] in words and pair_words[1] in words:
            found_pairs.append(pair)
            words.remove(pair_words[0])
            words.remove(pair_words[1])

    for word in words[:]:
        for pair in pairs:
            if word in pair.split():
                words.remove(word)
                break
    ordered_pairs = ", ".join(found_pairs)
    remaining_s = ", ".join(words)
    return ordered_pairs, remaining_s
接下来,实现一个自定义的 [~transformers.LogitsProcessor] 类,该类将为 words 列表中的标记分配值 0,并为不在 words 列表中的标记分配负值,这样在生成过程中就不会选择这些标记。这样,生成过程就会偏向于 words 列表中的单词。当列表中的一个单词被使用后,它也会被分配一个负值,这样就不会再次被选中。
py
class CustomLogitsProcessor(LogitsProcessor):
    def __init__(self, bias):
        super().__init__()
        self.bias = bias

    def __call__(self, input_ids, scores):
        if len(input_ids.shape) == 2:
            last_token_id = input_ids[0, -1]
            self.bias[last_token_id] = -1e10
        return scores + self.bias

word_ids = [tokenizer.encode(word, add_prefix_space=True)[0] for word in words]
bias = torch.full((tokenizer.vocab_size,), -float("Inf")).to("cuda")
bias[word_ids] = 0
processor = CustomLogitsProcessor(bias)
processor_list = LogitsProcessorList([processor])
将提示与之前在 styles 字典中定义的 cinematic 风格提示结合起来。
py
prompt = "a cat basking in the sun on a roof in Turkey"
style = "cinematic"

prompt = styles[style].format(prompt=prompt)
prompt
"cinematic film still of a cat basking in the sun on a roof in Turkey, highly detailed, high budget hollywood movie, cinemascope, moody, epic, gorgeous, film grain"
从 Gustavosta/MagicPrompt-Stable-Diffusion 检查点加载一个 GPT2 分词器和模型(此特定检查点经过训练以生成提示),以增强提示。
py
tokenizer = GPT2Tokenizer.from_pretrained("Gustavosta/MagicPrompt-Stable-Diffusion")
model = GPT2LMHeadModel.from_pretrained("Gustavosta/MagicPrompt-Stable-Diffusion", torch_dtype=torch.float16).to(
    "cuda"
)
model.eval()

inputs = tokenizer(prompt, return_tensors="pt").to("cuda")
token_count = inputs["input_ids"].shape[1]
max_new_tokens = 50 - token_count

generation_config = GenerationConfig(
    penalty_alpha=0.7,
    top_k=50,
    eos_token_id=model.config.eos_token_id,
    pad_token_id=model.config.eos_token_id,
    pad_token=model.config.pad_token_id,
    do_sample=True,
)

with torch.no_grad():
    generated_ids = model.generate(
        input_ids=inputs["input_ids"],
        attention_mask=inputs["attention_mask"],
        max_new_tokens=max_new_tokens,
        generation_config=generation_config,
        logits_processor=proccesor_list,
    )
然后,你可以将输入提示和生成的提示结合起来。随意查看生成的提示 (generated_part)、找到的词对 (pairs) 和剩余的词 (words)。这些都打包在 enhanced_prompt 中。
py
output_tokens = [tokenizer.decode(generated_id, skip_special_tokens=True) for generated_id in generated_ids]
input_part, generated_part = output_tokens[0][: len(prompt)], output_tokens[0][len(prompt) :]
pairs, words = find_and_order_pairs(generated_part, word_pairs)
formatted_generated_part = pairs + ", " + words
enhanced_prompt = input_part + ", " + formatted_generated_part
enhanced_prompt
["cinematic film still of a cat basking in the sun on a roof in Turkey, highly detailed, high budget hollywood movie, cinemascope, moody, epic, gorgeous, film grain quality sharp focus beautiful detailed intricate stunning amazing epic"]
最后,加载一个管道和带有 低权重 的偏移噪声 LoRA,以使用增强的提示生成图像。
py
pipeline = StableDiffusionXLPipeline.from_pretrained(
    "RunDiffusion/Juggernaut-XL-v9", torch_dtype=torch.float16, variant="fp16"
).to("cuda")

pipeline.load_lora_weights(
    "stabilityai/stable-diffusion-xl-base-1.0",
    weight_name="sd_xl_offset_example-lora_1.0.safetensors",
    adapter_name="offset",
)
pipeline.set_adapters(["offset"], adapter_weights=[0.2])

image = pipeline(
    enhanced_prompt,
    width=1152,
    height=896,
    guidance_scale=7.5,
    num_inference_steps=25,
).images[0]
image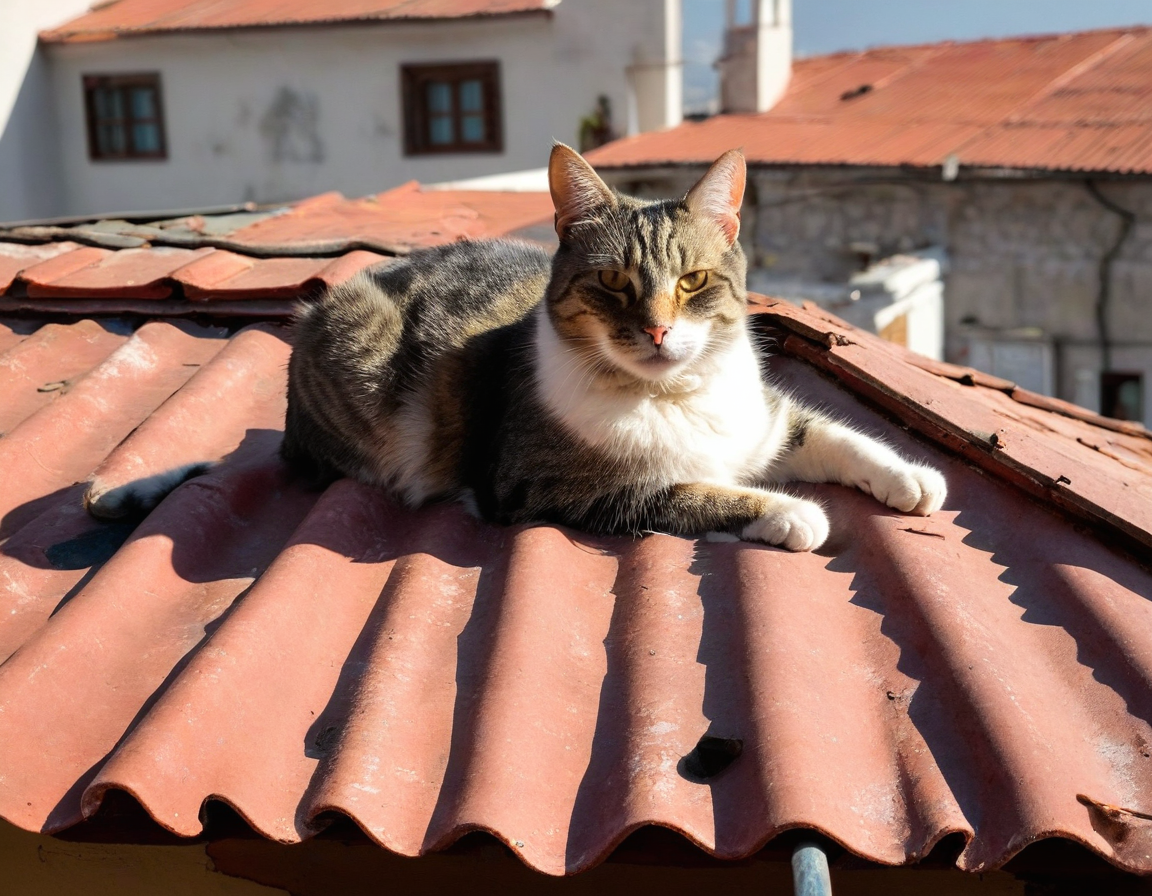
提示权重
提示权重提供了一种方法来强调或弱化提示中的某些部分,从而更好地控制生成图像的过程。一个提示可以包含多个概念,这些概念会被转换为上下文化的文本嵌入。这些嵌入被模型用来调节其交叉注意力层以生成图像(阅读 Stable Diffusion 的博客文章以了解更多工作原理)。
提示权重通过增加或减少与提示中概念相对应的文本嵌入向量的比例来实现,因为你可能不希望模型对所有概念给予同等关注。准备加权提示嵌入的最简单方法是使用 Compel,这是一个文本提示权重和混合库。一旦你有了加权提示嵌入,你可以将它们传递给任何具有 prompt_embeds(以及可选的 negative_prompt_embeds)参数的管道,例如 [StableDiffusionPipeline]、[StableDiffusionControlNetPipeline] 和 [StableDiffusionXLPipeline]。
本指南将向你展示如何在 🤗 Diffusers 中使用 Compel 对提示进行加权和混合。
在开始之前,请确保你已安装最新版本的 Compel:
py
# uncomment to install in Colab
#!pip install compel --upgrade
对于本指南,让我们使用提示词 "a red cat playing with a ball" 通过 [StableDiffusionPipeline] 生成一张图像:
py
from diffusers import StableDiffusionPipeline, UniPCMultistepScheduler
import torch
pipe = StableDiffusionPipeline.from_pretrained("CompVis/stable-diffusion-v1-4", use_safetensors=True)
pipe.scheduler = UniPCMultistepScheduler.from_config(pipe.scheduler.config)
pipe.to("cuda")
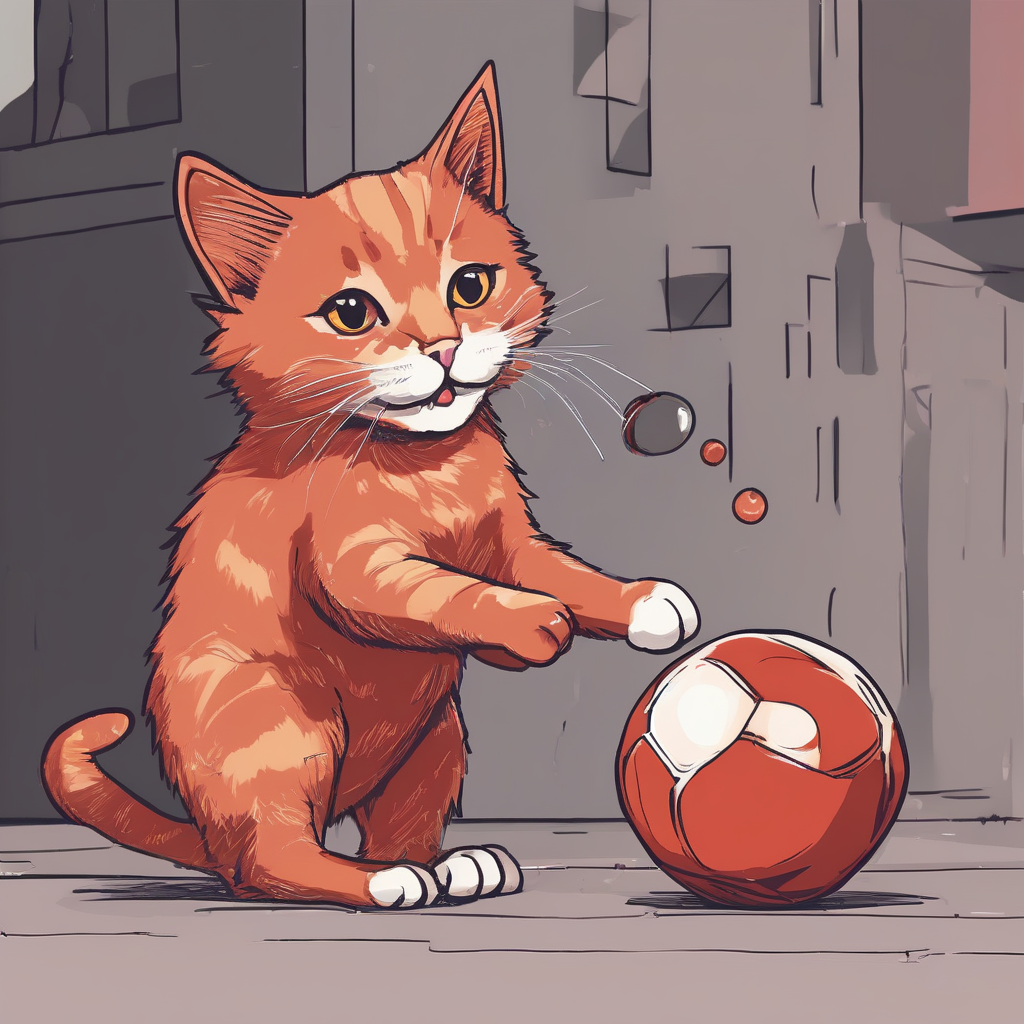
prompt = "a red cat playing with a ball"
generator = torch.Generator(device="cpu").manual_seed(33)
image = pipe(prompt, generator=generator, num_inference_steps=20).images[0]
image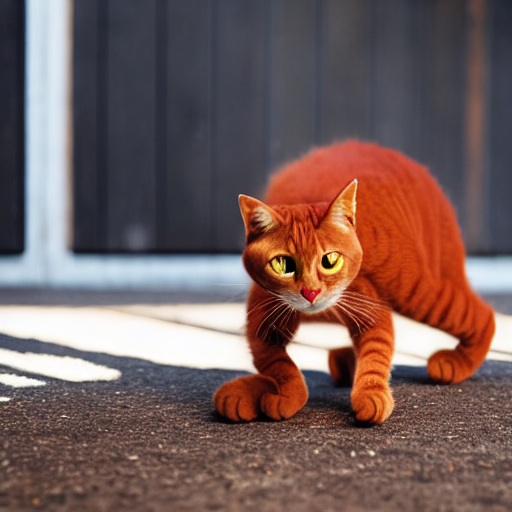
权重调整
你会注意到图像中没有"球"!让我们使用 compel 来增加提示词中"球"的概念权重。创建一个 Compel 对象,并传递一个分词器和文本编码器:
py
from compel import Compel
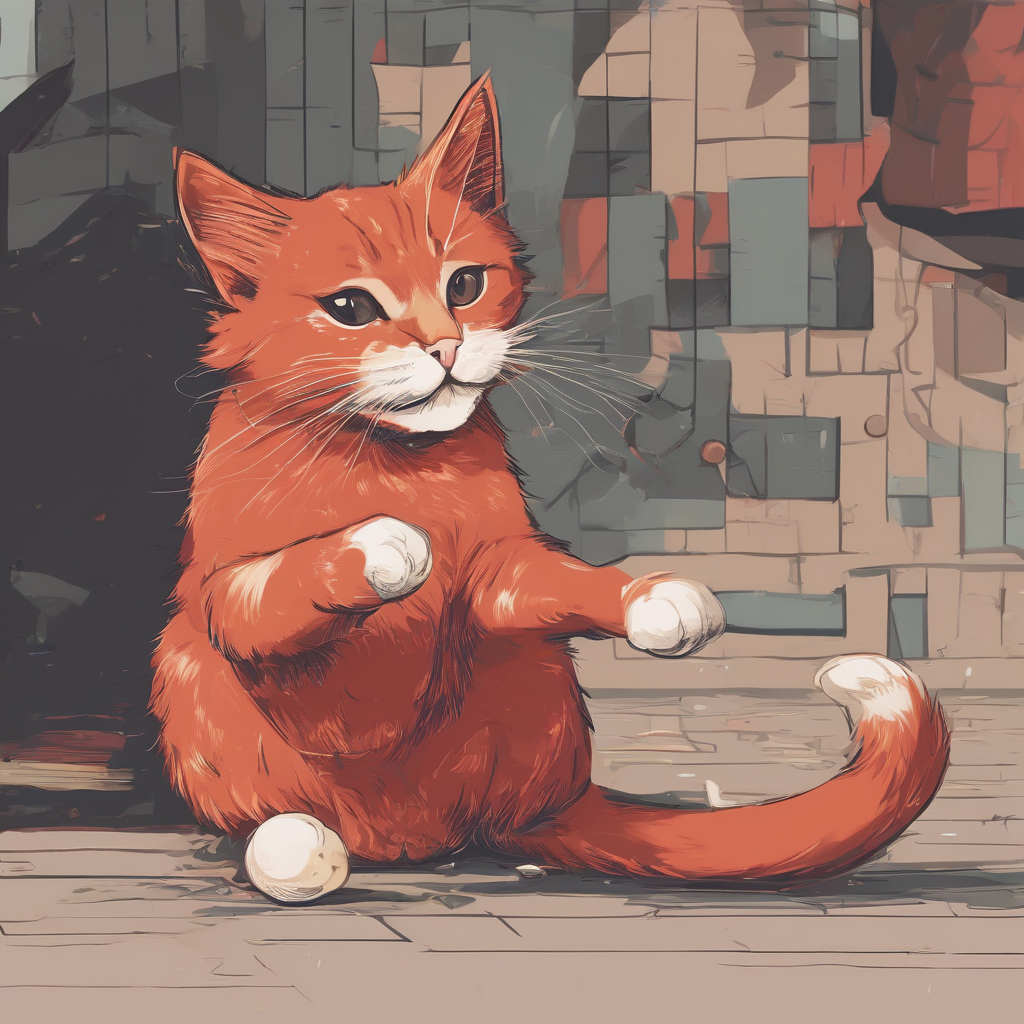
compel_proc = Compel(tokenizer=pipe.tokenizer, text_encoder=pipe.text_encoder)compel 使用 + 或 - 来增加或减少提示词中某个词的权重。要增加"球"的权重:
py
prompt = "a red cat playing with a ball++"将提示词传递给 compel_proc 以创建新的提示词嵌入,这些嵌入将传递给管道:
py
prompt_embeds = compel_proc(prompt)
generator = torch.manual_seed(33)

image = pipe(prompt_embeds=prompt_embeds, generator=generator, num_inference_steps=20).images[0]
image
要降低提示词中某些部分的权重,请使用 - 后缀:
py
prompt = "a red------- cat playing with a ball"
prompt_embeds = compel_proc(prompt)

generator = torch.manual_seed(33)

image = pipe(prompt_embeds=prompt_embeds, generator=generator, num_inference_steps=20).images[0]
image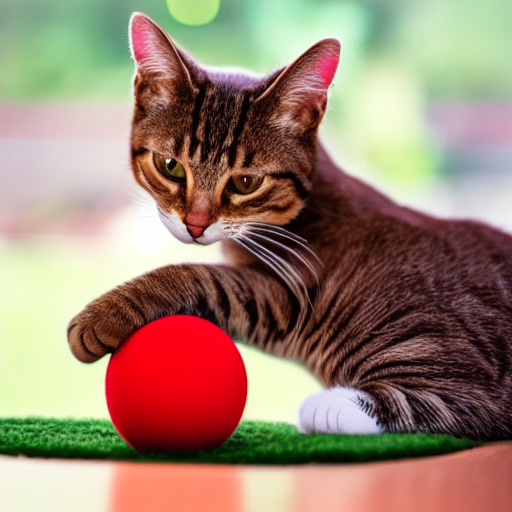
你甚至可以在同一个提示中增加或减少多个概念的权重:
py
prompt = "a red cat++ playing with a ball----"
prompt_embeds = compel_proc(prompt)

generator = torch.manual_seed(33)

image = pipe(prompt_embeds=prompt_embeds, generator=generator, num_inference_steps=20).images[0]
image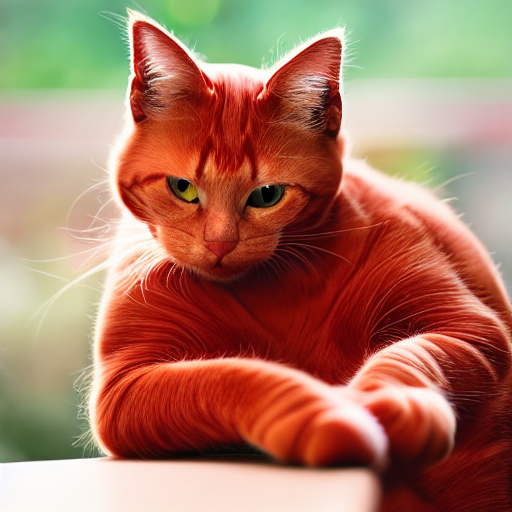
混合
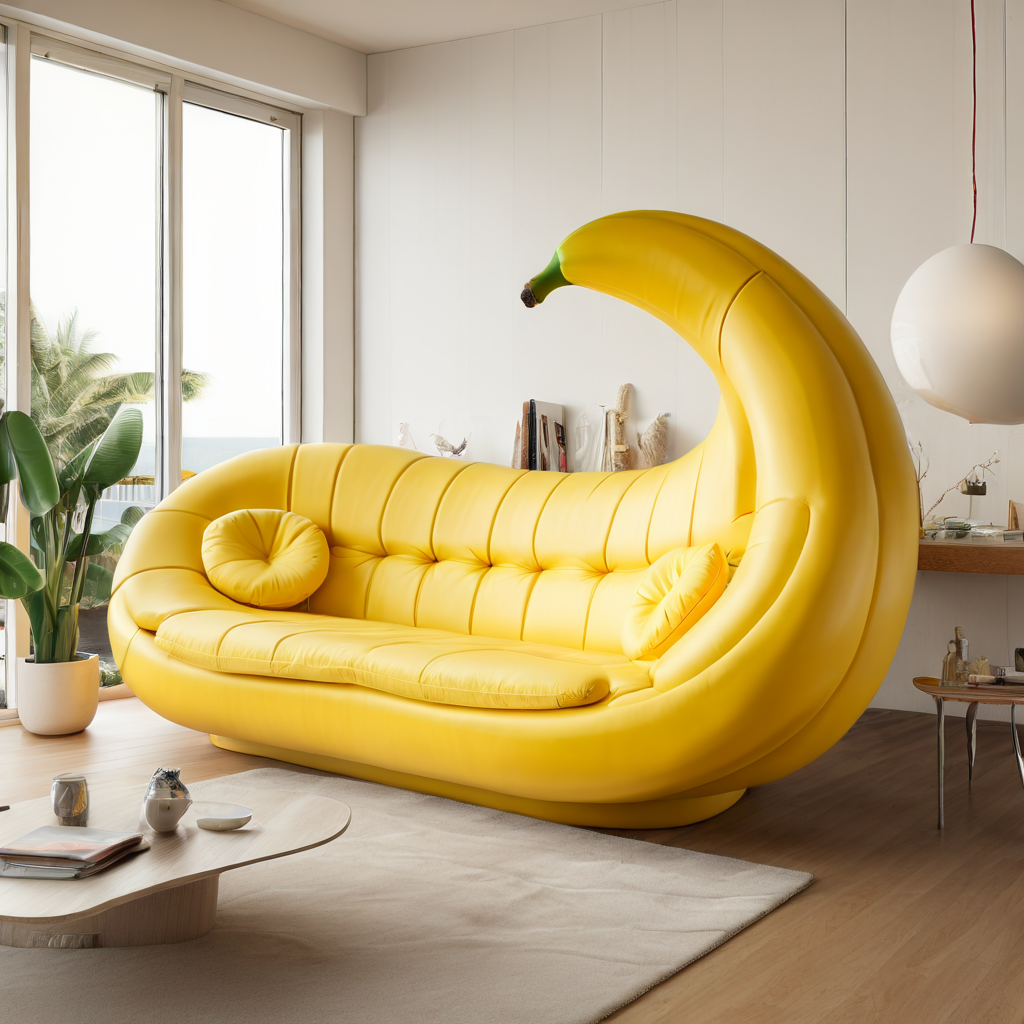
你还可以通过在提示列表中添加.blend()并传递一些权重来创建一个加权的混合提示。你的混合结果可能并不总是如你所预期的那样,因为它打破了一些关于文本编码器如何工作的假设,所以尽情享受并进行实验吧!
py
prompt_embeds = compel_proc('("a red cat playing with a ball", "jungle").blend(0.7, 0.8)')
generator = torch.Generator(device="cuda").manual_seed(33)

image = pipe(prompt_embeds=prompt_embeds, generator=generator, num_inference_steps=20).images[0]
image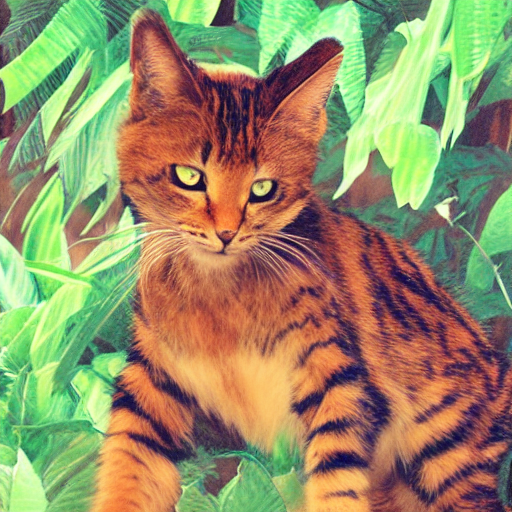
结合
结合功能会独立地扩散每个提示,并通过它们的加权和来连接结果。在提示列表的末尾添加.and()来创建一个结合:
py
prompt_embeds = compel_proc('["a red cat", "playing with a", "ball"].and()')
generator = torch.Generator(device="cuda").manual_seed(55)

image = pipe(prompt_embeds=prompt_embeds, generator=generator, num_inference_steps=20).images[0]
image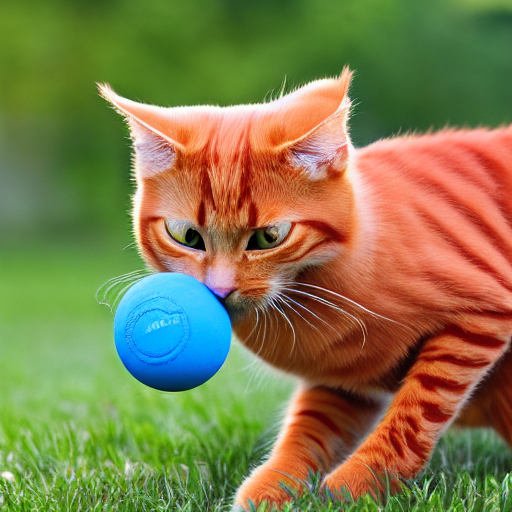
文本反转
文本反转 是一种从一些图像中学习特定概念的技术,你可以使用这些概念来生成基于该概念的新图像。
创建一个管道并使用 [~loaders.TextualInversionLoaderMixin.load_textual_inversion] 函数来加载文本反转嵌入(可以随意浏览 Stable Diffusion 概念化器 以获取 100 多个已训练的概念):
py
import torch
from diffusers import StableDiffusionPipeline
from compel import Compel, DiffusersTextualInversionManager

pipe = StableDiffusionPipeline.from_pretrained(
  "stable-diffusion-v1-5/stable-diffusion-v1-5", torch_dtype=torch.float16,
  use_safetensors=True, variant="fp16").to("cuda")
pipe.load_textual_inversion("sd-concepts-library/midjourney-style")
Compel 提供了一个 DiffusersTextualInversionManager 类,用于简化带有文本反转的提示权重。实例化 DiffusersTextualInversionManager 并将其传递给 Compel 类:
py
textual_inversion_manager = DiffusersTextualInversionManager(pipe)
compel_proc = Compel(
    tokenizer=pipe.tokenizer,
    text_encoder=pipe.text_encoder,
    textual_inversion_manager=textual_inversion_manager)
将概念融入到提示中以进行条件生成,使用 <concept> syntax:
py
prompt_embeds = compel_proc('("A red cat++ playing with a ball <midjourney-style>")')

image = pipe(prompt_embeds=prompt_embeds).images[0]
image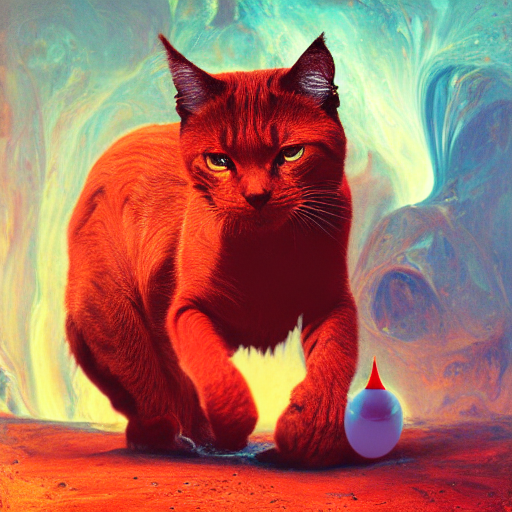
DreamBooth
DreamBooth 是一种用于生成给定主题的上下文图像的技术,只需使用少量主题图像进行训练。它类似于文本反转,但 DreamBooth 训练整个模型,而文本反转仅微调文本嵌入。这意味着你应该使用 [~DiffusionPipeline.from_pretrained] 来加载 DreamBooth 模型(欢迎浏览 Stable Diffusion Dreambooth 概念库 获取 100 多个已训练的模型):
py
import torch
from diffusers import DiffusionPipeline, UniPCMultistepScheduler
from compel import Compel

pipe = DiffusionPipeline.from_pretrained("sd-dreambooth-library/dndcoverart-v1", torch_dtype=torch.float16).to("cuda")
pipe.scheduler = UniPCMultistepScheduler.from_config(pipe.scheduler.config)
创建一个带有分词器和文本编码器的 Compel 类,并将你的提示传递给它。根据你使用的模型,你需要将模型的唯一标识符合并到你的提示中。例如,dndcoverart-v1 模型使用标识符 dndcoverart:
py
compel_proc = Compel(tokenizer=pipe.tokenizer, text_encoder=pipe.text_encoder)
prompt_embeds = compel_proc('("magazine cover of a dndcoverart dragon, high quality, intricate details, larry elmore art style").and()')
image = pipe(prompt_embeds=prompt_embeds).images[0]
image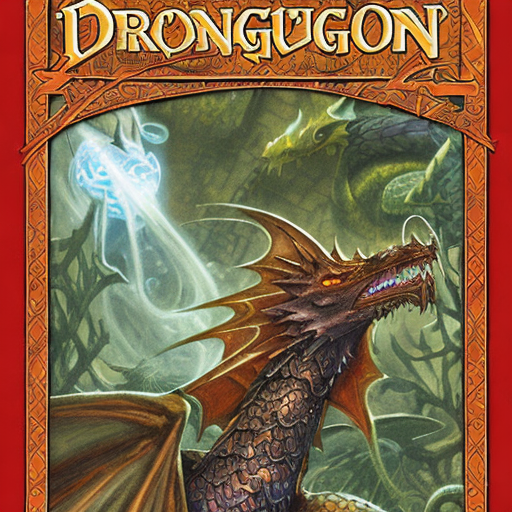
Stable Diffusion XL
Stable Diffusion XL (SDXL) 有两个分词器和文本编码器,因此其使用方式略有不同。为了解决这个问题,你应该将这两个分词器和编码器传递给 Compel 类:
py
from compel import Compel, ReturnedEmbeddingsType
from diffusers import DiffusionPipeline
from diffusers.utils import make_image_grid
import torch

pipeline = DiffusionPipeline.from_pretrained(
  "stabilityai/stable-diffusion-xl-base-1.0",
  variant="fp16",
  use_safetensors=True,
  torch_dtype=torch.float16
).to("cuda")

compel = Compel(
  tokenizer=[pipeline.tokenizer, pipeline.tokenizer_2] ,
  text_encoder=[pipeline.text_encoder, pipeline.text_encoder_2],
  returned_embeddings_type=ReturnedEmbeddingsType.PENULTIMATE_HIDDEN_STATES_NON_NORMALIZED,
  requires_pooled=[False, True]
)这次,让我们将第一个提示中的"ball"权重增加1.5倍,并将第二个提示中的"ball"权重降低0.6倍。[StableDiffusionXLPipeline] 还需要 pooled_prompt_embeds(以及可选的 negative_pooled_prompt_embeds),因此你应该将这些内容与条件张量一起传递给管道:
py
# apply weights
prompt = ["a red cat playing with a (ball)1.5", "a red cat playing with a (ball)0.6"]
conditioning, pooled = compel(prompt)

# generate image
generator = [torch.Generator().manual_seed(33) for _ in range(len(prompt))]
images = pipeline(prompt_embeds=conditioning, pooled_prompt_embeds=pooled, generator=generator, num_inference_steps=30).images
make_image_grid(images, rows=1, cols=2)